First pick the image you wish to use for the button (This one is courtesy of the gnome user interface and comes under the GNU license be careful with licensing) and ensure it is the required size. This will be the off state image.
Make sure the background is set to be transparent, then save the image as a PNG.
Next copy the image and edit the copy, Create a new layer identical to the bottom layer directly over the top. Fill the top layer foreground with an on/off colour and then blend the images together.
This image will be the on state for the button.
In LabVIEW drop a classic square flat button and right click advanced customize.
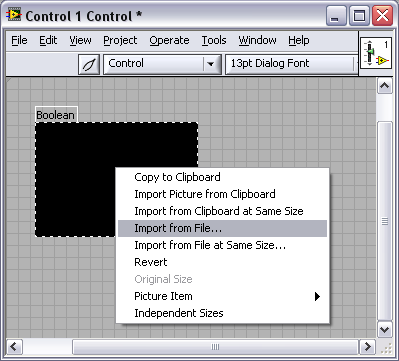
In the control front panel click on the spanner to change it to tweezers, then right click on the image import from file and choose your off state image.
Right click the control and select copy the to clipboard.
Right click the control select picture item then the third picture, right click and select import from clipboard. The image is now complete in the off state.
Repeat the process for picture item 2 and 4 with the on state image.
Click the tweezers to switch back to control mode and the custom button is finished.


No comments:
Post a Comment